Have you ever been all geared up for a thrilling motorcycle ride, only to encounter a not-so-thrilling technical hiccup? If you’re nodding your head right now, then you’re in the right place. In the motorcycling world, the mantra, ‘knowledge is power’, holds true, especially when it comes to DIY repairs and diagnostics. Understanding how to test a stator on a motorcycle, for example, can save you both time and money – not to mention the priceless feeling of accomplishment. We understand that this may sound eerily similar to rocket science, but fear not.
In this guide, we’ll unravel this seemingly complex process into digestible steps. So, strap in as we journey together through the nuts and bolts of stator testing, sharing practical advice and captivating anecdotes along the way. Ready to tap into your inner mechanic? Let’s get started!
What Is A Stator and What Does It Do?
If you’re a motorcycle enthusiast, you’ve likely heard of a stator. It’s one of those components that might not be on your radar until it starts causing problems. The stator is an integral part of your motorcycle’s charging system, working as a generator to power your bike’s electrical system and recharge the battery. Without it, you’d be left stranded with a dead battery and a bike that won’t start.
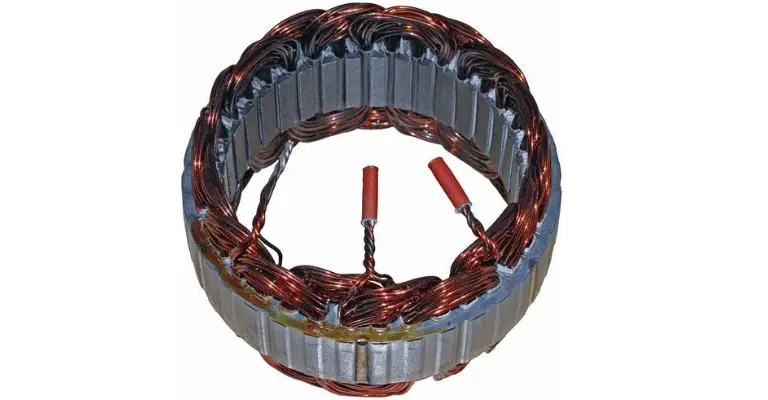
As the unsung hero of your motorcycle’s engine, the stator does its job quietly in the background. But when it fails, the signs are loud and clear. Understanding your motorcycle stator and its functions is the first step to becoming a proficient DIY motorcycle mechanic.
Importance of A Well-Functioning Motorcycle Stator
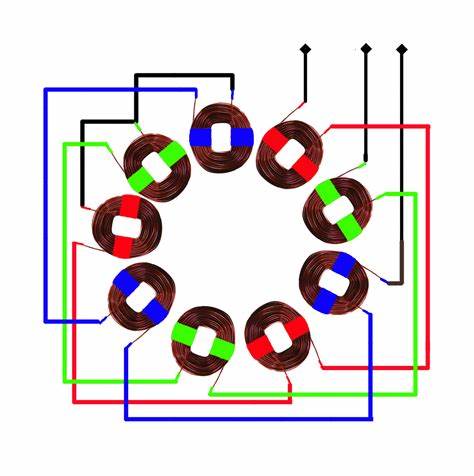
A well-functioning motorcycle stator is crucial for maintaining your motorcycle’s overall health and performance. It is responsible for converting the engine’s mechanical energy into electrical energy, which powers all the electrical components of your motorcycle. This includes the ignition system, headlights, tail lights, turn signals, and the battery.
When a stator fails, it disrupts the flow of power to these components, leading to a multitude of issues. You might notice your headlights dimming, your battery dying, or your engine misfiring. In severe cases, a faulty stator can even lead to complete motorcycle failure. Hence, it’s essential to regularly check your motorcycle stator and ensure it is in good working condition.
Hot topic: Do Motorcycles Have Alternators? Yes and No (Find Out)
Common Symptoms of a Faulty Motorcycle Stator
Before you dive into testing your motorcycle stator, it’s crucial to recognize the signs of a faulty one. The most common symptom is a dead or consistently dying battery. If you find yourself always charging the battery or replacing it, the fault could be with the stator.
Another sign is dim or flickering lights. The stator provides power to your motorcycle’s lights, so any irregularities could point to a problem. Other symptoms include difficulty starting the bike, a misfiring engine, or a motorcycle that runs fine but suddenly dies. If you notice any of these signs, it’s time to put on your mechanic hat and start testing your motorcycle stator.
Related: How To Tell If Your Stator Is Bad 101 (Full Guide)
Tools Needed to Test a Motorcycle Stator
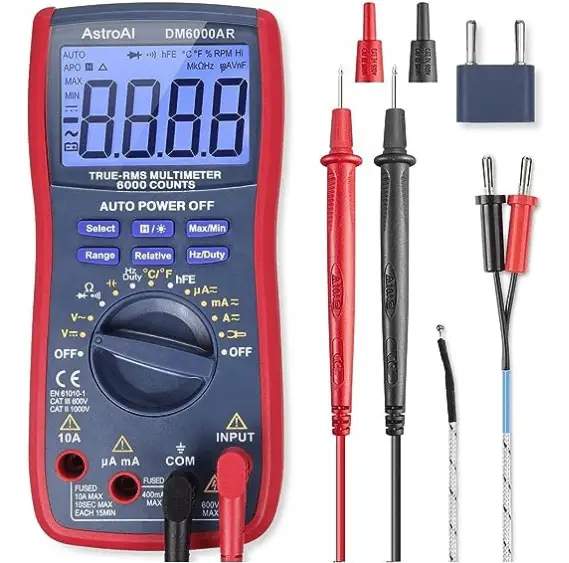
To test your motorcycle stator, you’ll need a few basic tools. The most important one is a multimeter. This essential device lets you measure the voltage and resistance of your stator, helping you identify any faults. You’ll also need a set of screwdrivers, a wrench, and a clean cloth for removing and cleaning the stator.
Apart from these, a well-lit workspace is crucial. The stator is located in your motorcycle’s engine, and working in a dimly lit space can make the process challenging. It’s also a good idea to have the motorcycle’s service manual handy. It provides detailed instructions on how to access and remove the stator, making your job much easier.
Step-by-Step Guide on How to Test a Motorcycle Stator
Now that you’re equipped with the necessary knowledge and tools, it’s time to start testing your motorcycle stator. If you’d prefer a visual guide, check out the video below, or keep scrolling for the step-by-step:
- The first step is to turn off the motorcycle and let it cool down. Working on a hot engine can lead to burns, so it’s best to wait a while before starting.
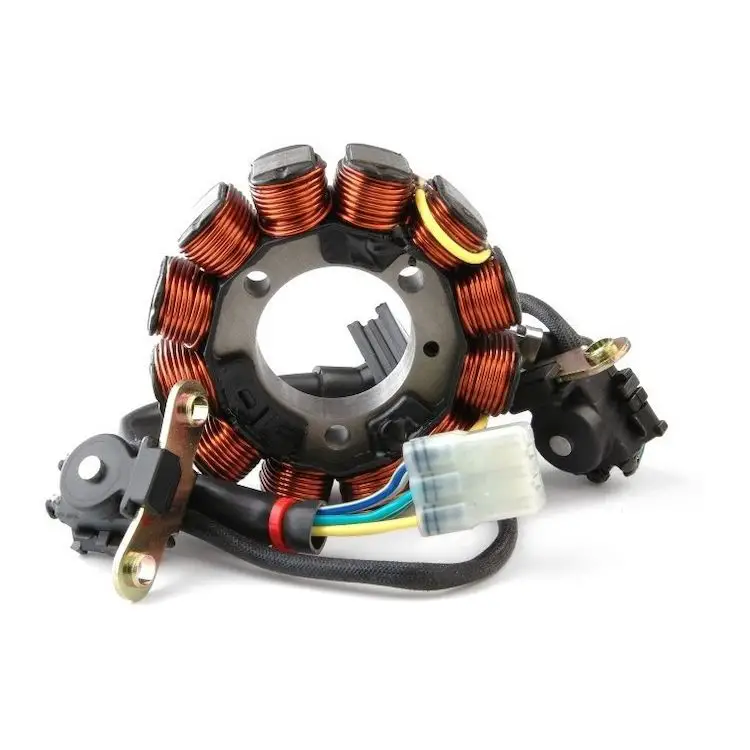
- Once the engine has cooled down, locate the stator. It’s usually found on the left side of the engine, behind the cover.
- Using a wrench and screwdriver, remove the cover to access the stator. Be sure to keep track of all screws and bolts.
- With the stator exposed, look for any visible signs of damage. This could include burned or broken wires, or a melted or discolored stator.
- If the stator looks fine, it’s time to use the multimeter to test it. You’ll need to measure both the resistance and the voltage of the stator.
How to Use a Multimeter to Test a Motorcycle Stator
Now comes the technical part of testing your motorcycle stator: using a multimeter.
- To measure the stator’s resistance, set your multimeter to the ohms (Ω) setting. Connect the multimeter’s probes to the stator’s wires as per your motorcycle’s service manual. The reading on the multimeter should be within the range specified in the manual. If it’s outside this range, your stator is likely faulty.
- To check the stator’s voltage, start the motorcycle and let it idle. Now, switch your multimeter to the AC voltage setting and connect the probes to the stator’s wires. The reading should be within the specifications in your service manual. A lower reading indicates a problem with the stator.
Remember, using a multimeter requires caution. Always make sure to follow the instructions in your service manual and use the multimeter correctly to avoid any accidents.
Related: Motorcycle Stator Replacement Cost: What’s The Damage?
Tips for Checking the Stator on a Motorcycle
Testing your motorcycle stator can seem daunting, especially if you’ve never done it before. Here are some tips to help you along the way.
- Always refer to your motorcycle’s service manual. It provides specific instructions for your bike model, making the process much easier.
- Take your time. Rushing through the process could lead to mistakes or missed signs of damage.
- Be organized. Keep track of all screws, bolts, and parts you remove. This will make reassembling the bike much smoother.
- If you’re unsure about anything, don’t hesitate to seek help. There are numerous online forums and videos where you can find answers to your queries.
When to Seek Professional Help for Stator Testing
As much as you might enjoy playing mechanic, there are times when it’s best to seek professional help. If you’ve followed all the steps and are still unsure about your stator’s condition, it might be time to consult a professional.
Also, if your stator tests faulty and you’re uncomfortable replacing it yourself, a professional mechanic can handle the task. The goal is to ensure your motorcycle is running safely and smoothly, and sometimes, that requires a professional touch.
Preventive Measures to Keep your Motorcycle Stator in Good Shape
Prevention is better than cure. To keep your motorcycle stator in good shape, make sure to service your bike regularly. Regular servicing includes checking the stator and the entire electrical system for any signs of wear or damage.
Also, avoid overloading your motorcycle’s electrical system. Adding too many electrical accessories can strain the stator and lead to premature failure. Lastly, if you notice any symptoms of a faulty stator, address them immediately. Ignoring the signs could lead to more severe issues down the line.
Conclusion: Embrace Your Inner Mechanic
Testing your motorcycle stator might seem like a daunting task, but with the right knowledge and tools, you can do it. Not only will it save you a trip to the mechanic, but it will also give you a better understanding of your motorcycle’s workings. So go ahead, embrace your inner mechanic, and start testing your motorcycle stator today.