Imagine standing on the edge of a golf course, your cart silent when it should be humming with life—it's a frustrating moment that many face. When your golf cart won't start, pinpointing the issue can feel like searching for a needle in a haystack. You need to approach it systematically, starting with the battery and connections, then moving on to other potential culprits. But before you jump in, you might wonder: what's really causing this silence? The answers might surprise you as you uncover the underlying issues.
Key Takeaways
- Check battery voltage using a multimeter; a healthy battery should read between 12.6 to 12.8 volts.
- Inspect battery connections for corrosion and ensure all terminals are tight and secure.
- Test the charger and ensure it outputs the correct voltage; look for any visible damage.
- Listen for a clicking sound from the solenoid when engaging the accelerator; it indicates proper function.
- Review fuses for damage or blown filaments, ensuring they match the required specifications for your golf cart.
Check the Battery Voltage
Checking the battery voltage is essential for diagnosing golf cart issues. You'll need a multimeter to measure the voltage accurately. Start by making sure the golf cart is turned off. Connect the multimeter's red lead to the positive terminal and the black lead to the negative terminal of the battery. A fully charged 12-volt battery should read between 12.6 to 12.8 volts.
If the reading is below 12.4 volts, your battery may be partially discharged, while anything below 12 volts indicates a dead or failing battery.
Next, if you suspect multiple batteries in a series configuration, check each one individually. Make sure to note the readings, as discrepancies can indicate a faulty battery affecting overall performance. If you find one battery showing considerably lower voltage, that could be a red flag.
After taking the measurements, compare them to the manufacturer's specifications to make sure everything's within the acceptable range. If your readings confirm a low voltage issue, you may need to recharge or replace the battery.
Always prioritize safety by wearing gloves and goggles when working with batteries. Proper voltage checks can save you time and money in your golf cart maintenance.
Inspect Battery Connections
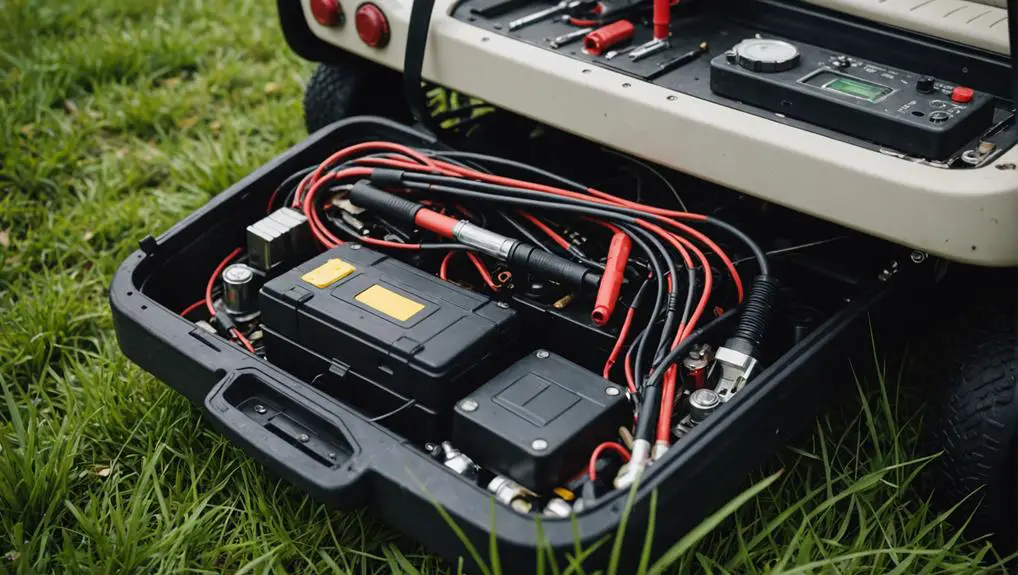
Often, faulty battery connections can lead to performance issues in your golf cart. Start by visually inspecting the battery terminals for corrosion, which appears as a white, powdery substance. If you see corrosion, it can disrupt the electrical flow. To clean it, use a mixture of baking soda and water, applying it with a brush to scrub away the buildup. Rinse thoroughly and dry before reconnecting.
Next, check the tightness of the connections. Loose cables can prevent the battery from delivering sufficient power. Use a wrench to confirm the connections are snug, but avoid over-tightening, which can damage the terminals.
Examine the cables for any signs of fraying or damage. If you find any issues, replace the cables to guarantee maximum conductivity.
Additionally, make sure that the battery itself is properly secured in its compartment to prevent movement that could loosen connections while driving.
Test the Charger

After confirming the battery connections are secure and free of corrosion, it's important to verify that the charger is functioning correctly. Start by inspecting the charger for any visible damage, such as frayed wires or cracked casing.
If everything looks intact, plug the charger into a working outlet and connect it to the golf cart's battery.
Next, check the charger's indicator lights. Most chargers have LEDs that indicate charging status. If the light doesn't illuminate, you may have a defective charger or an issue with the power source.
To further test the charger, use a multimeter to measure the output voltage. Set the multimeter to the appropriate DC voltage range, typically between 36-48 volts for most golf carts.
Disconnect the charger from the cart, then place the multimeter probes on the charger's output terminals. A reading within the charger's specifications confirms it's working properly.
If the charger shows no output or an incorrect voltage, it might need replacement. Always consult the manufacturer's guidelines for specific testing procedures related to your charger model.
This process confirms you've ruled out any charger-related issues before moving on to other potential problems.
Examine the Keyswitch
A common issue that can affect the operation of your golf cart is a faulty keyswitch. If your cart won't start, it's important to examine this component first. The keyswitch is responsible for initiating power to the vehicle's electrical system. If it's malfunctioning, you might experience starting issues.
Start by visually inspecting the keyswitch for any signs of damage, such as cracks or corrosion. Then, check the wiring connected to the keyswitch for loose connections or frayed wires.
Here are some specific actions to take:
- Turn the key: Verify the switch turns smoothly without resistance.
- Test for continuity: Use a multimeter to check if the keyswitch is allowing current to flow when turned on.
- Listen for clicks: When you turn the key, listen for a clicking sound indicating the internal mechanism is functioning.
If you find any irregularities during your examination, replacing the keyswitch might be necessary.
Assess the Solenoid

To assess the solenoid, first, listen for a click sound when you engage the accelerator.
If you don't hear it, there might be an issue with the solenoid itself.
Next, test the voltage output to verify it's functioning properly and delivering the necessary power.
Check for Click Sound
When you turn the key or press the start button on your golf cart, listen closely for a click sound; this noise can indicate whether the solenoid is functioning properly. The solenoid acts as a switch to connect the battery to the motor, and a clicking noise suggests it's attempting to engage. If you don't hear a click, there's likely a problem.
To assess the solenoid further, consider these points:
- No Click: If you hear nothing, the solenoid might be faulty or not receiving power.
- Repeated Clicking: A rapid clicking sound often means the battery is weak or the solenoid is stuck.
- Single Click: A single click could indicate the solenoid is activating, but the motor isn't turning over due to other issues.
If you detect a click but the golf cart still won't start, it's crucial to investigate further. This might involve checking connections and inspecting the battery.
Always verify safety precautions are taken when working with electrical components. Identifying the click sound is your first step in diagnosing the problem, helping you narrow down potential issues with your golf cart's starting system.
Test Voltage Output
Before diving deeper into troubleshooting, testing the voltage output at the solenoid is essential for diagnosing potential issues. The solenoid acts as a switch, controlling the flow of electricity from the battery to the motor.
To begin, verify your golf cart is in the "off" position for safety. Next, locate the solenoid, which is usually near the battery pack.
Using a multimeter, set it to the DC voltage setting. Connect the black probe to the negative terminal of the battery and the red probe to the input terminal of the solenoid. You should see a voltage reading close to the battery voltage, typically around 12-48 volts, depending on your golf cart's system.
If you don't get a reading, there might be an issue with the battery or connections leading to the solenoid.
Next, check the output terminal of the solenoid while someone attempts to start the cart. You should see voltage if the solenoid is functioning correctly. If not, the solenoid may be faulty and require replacement.
This simple test helps narrow down the problem, making further troubleshooting more efficient.
Review the Fuses
To troubleshoot your golf cart, start by locating the fuse box, which is typically found near the battery or under the dash.
Once you've found it, inspect each individual fuse for signs of damage or a blown filament.
Replacing any faulty fuses may resolve your electrical issues and restore functionality.
Check Fuse Box Location
The fuse box in your golf cart plays an important role in its electrical system, so locating it's essential for troubleshooting. Typically, you can find the fuse box either under the seat or beneath the dashboard. Knowing where to look will save you time and help you diagnose issues more efficiently.
To locate the fuse box, follow these steps:
- Check under the seat: Many golf carts have the fuse box positioned beneath the driver's seat for easy access.
- Inspect the dashboard area: Some models place the fuse box behind the dashboard, often hidden by a panel.
- Refer to the owner's manual: If you're unsure, the manual will provide precise information about your specific model's fuse box location.
Once you've located the fuse box, you can proceed to review the fuses. Remember that a blown fuse can prevent your golf cart from starting, so ensuring you've found the right location is vital before moving on to inspect individual fuses.
This step is fundamental in diagnosing why your golf cart won't start, allowing you to address electrical issues methodically.
Inspect Individual Fuses
After locating the fuse box, you'll want to inspect each individual fuse to determine their condition.
Start by removing the fuses one at a time. Look for any visible signs of damage, like a broken filament or discoloration. If a fuse appears burnt or the filament is broken, it's likely the cause of your golf cart not starting.
Next, use a multimeter to test the continuity of each fuse. Set the multimeter to the continuity setting and touch the probes to each end of the fuse. If the multimeter beeps or shows a low resistance reading, the fuse is good. If it doesn't, you'll need to replace that fuse.
It's also a good idea to check the fuse ratings to verify they match the specifications for your golf cart. Using a fuse with the wrong rating can lead to further electrical issues.
Look at the Ignition System

Many golf cart issues stem from problems within the ignition system, so it's essential to examine this component first.
Start by checking the ignition switch and wiring. A faulty switch can prevent power from reaching the motor, leaving you stranded.
Next, inspect the battery connections. Loose or corroded terminals can impede the flow of electricity.
Here are three key areas to focus on:
- Ignition Coil: Verify the ignition coil is functioning properly. A malfunction can disrupt the spark needed for ignition.
- Spark Plug: Check the condition of the spark plug. If it's worn out or dirty, it may not produce a sufficient spark to start the engine.
- Wiring Harness: Look for any frayed or damaged wires in the ignition system. Damaged wiring can cause shorts or open circuits, preventing the cart from starting.
Investigate the Motor
Investigating the motor is essential when diagnosing golf cart issues, as it plays a central role in the cart's performance.
Start by checking the motor itself for any visible signs of damage or wear. Look for cracks, corrosion, or loose components that could affect functionality.
Next, test the motor's resistance using a multimeter. Disconnect the motor from the power source and measure the resistance between the terminals. A reading that's too high or low indicates an issue with the motor's windings.
Also, verify that the motor spins freely. Manually turn the motor shaft to check for any obstruction or excessive resistance. If the motor feels stiff or doesn't turn, it may need servicing or replacement.
Check for Loose Wires

Start by inspecting the battery connections to guarantee they're secure and free from corrosion.
Next, examine the wiring harness for any signs of wear or loose connections that could disrupt power flow.
Addressing these issues can often resolve performance problems in your golf cart.
Inspect Battery Connections
Before diving into more complex diagnostics, it's crucial to inspect battery connections, as loose wires can lead to inconsistent power delivery and performance issues in your golf cart.
Start by verifying the battery terminals are clean and free from corrosion. Corroded connections can hinder current flow, so use a wire brush to clean the terminals if necessary.
Next, check the tightness of the connections. Loose wires can create resistance, causing your golf cart not to start.
To guarantee a proper connection, follow these steps:
- Tighten the terminal bolts: Make sure they're snug but not overly tight to avoid damaging the battery posts.
- Inspect the cables: Look for any signs of fraying or damage, which could indicate the need for replacement.
- Verify the ground connection: Confirm the negative cable is securely connected to a clean, rust-free point on the frame.
Examine Wiring Harness
Inspecting the wiring harness is essential for identifying potential issues that could affect your golf cart's performance. Start by visually checking the entire harness for any signs of wear, fraying, or damage. Loose or corroded connections can interrupt the electrical flow, causing your cart not to start.
Next, focus on the connectors. Verify they're secure and free from dirt or corrosion. A loose wire can lead to intermittent connectivity, making your cart unreliable. If you notice any loose connections, gently tighten them using a suitable tool.
Additionally, look for any exposed wires, as these can create shorts that impair performance. If you spot any, consider replacing that section of wire.
Don't forget to check ground connections, as poor grounding can lead to starting issues. Make certain that all grounding points are clean and tightly secured.
Consult the User Manual
Consulting the user manual is essential when diagnosing issues with your golf cart. This document provides specific information tailored to your model, which is invaluable in troubleshooting. It can help you identify potential problems, understand the components, and follow the correct diagnostic procedures.
Here's what you should look for in your manual:
- Wiring Diagrams: These visuals help you trace electrical connections and identify potential shorts or disconnections.
- Troubleshooting Section: Most manuals include a dedicated section with common issues and their solutions, guiding you step-by-step.
- Maintenance Guidelines: Understanding regular maintenance can prevent many starting issues, so check for recommended service intervals and procedures.
Frequently Asked Questions
What Are Common Signs of a Failing Golf Cart Battery?
When a golf cart battery starts failing, you'll notice several signs.
First, you might see a significant decrease in power, making it difficult to climb hills or maintain speed.
You may also encounter slow cranking or a complete failure to start.
Additionally, check for corrosion around the terminals or a swollen case, which indicates damage.
How Often Should I Service My Golf Cart's Electrical Components?
You should service your golf cart's electrical components at least once a year to guarantee peak performance.
Regular inspections can prevent issues like corrosion, loose connections, and worn-out parts.
If you use your cart frequently or in harsh conditions, consider more frequent checks, such as every six months.
Always keep an eye on the battery, wiring, and switches, as these play vital roles in the overall functionality of your golf cart.
Can Extreme Weather Affect Golf Cart Performance?
Sure, let's just pretend your golf cart doesn't mind the weather!
But in reality, extreme temperatures can greatly affect its performance. Cold weather can drain batteries faster, while heat can overheat components and reduce efficiency.
You'll notice sluggish acceleration or diminished range if you're not careful.
What Tools Do I Need for Basic Golf Cart Maintenance?
For basic golf cart maintenance, you'll need a few essential tools.
A multimeter helps you test electrical systems, while a socket set is vital for tightening or removing bolts.
A screwdriver set is important for various screws, and pliers can assist with gripping and bending wires.
Don't forget a tire pressure gauge to monitor tire health.
Where Can I Find Replacement Parts for My Golf Cart?
You can find replacement parts for your golf cart at several places. Check local golf cart dealerships for genuine parts.
Online retailers like Amazon, eBay, or specialized sites like Golf Cart King offer a wide selection.
Don't forget to visit forums or community groups where fellow enthusiasts share recommendations.
Always verify the parts are compatible with your specific model to avoid any issues during installation.
Conclusion
To summarize, diagnosing your golf cart that won't start involves a systematic approach. Start with the battery voltage and connections, then test the charger and examine the keyswitch. Don't overlook the solenoid and ignition system, as they're crucial components. Check for loose wires throughout the system. Think of troubleshooting like using a trusty flip phone; you need to go step by step to pinpoint the issue. Always consult your user manual for specific guidance.