You might not realize that a faulty golf cart charger can often be traced back to simple issues rather than complex repairs. Before you panic, it's crucial to assess several aspects, such as the power source and connections. If you're unsure where to begin or what common mistakes people make, understanding these key steps could save you time and resources. By addressing these elements, you could potentially resolve the problem without needing costly repairs. Let's explore what you can do to troubleshoot and get your charger back in working order.
Key Takeaways
- Check the power source by verifying the outlet voltage and inspecting for blown fuses or damaged cords.
- Inspect charger connections and ensure they are clean and securely attached to both the charger and golf cart.
- Examine the battery health by checking for corrosion, measuring voltage, and using a hydrometer for specific gravity readings.
- Test the charger with a multimeter to confirm proper voltage output at the charger's terminals.
- Seek professional repair if issues persist after troubleshooting, to ensure safety and proper functionality.
Check Power Source
Before diving into any repairs, it's crucial to verify that the power source is functioning properly. Start by checking the outlet where you plug in the charger. Use a voltage tester to confirm that the outlet is delivering the correct voltage, typically 110-120 volts for standard chargers.
If the outlet's dead, you'll need to reset the circuit breaker or check for any blown fuses.
Next, inspect the power cord of the charger itself. Look for any visible damage such as frays or breaks. If you see any, you should replace the power cord before proceeding.
Also, verify that the plug fits securely into the outlet without any wiggling.
If you're using an extension cord, confirm it's rated for the charger's power requirements. An inadequate gauge could lead to voltage drops, affecting performance.
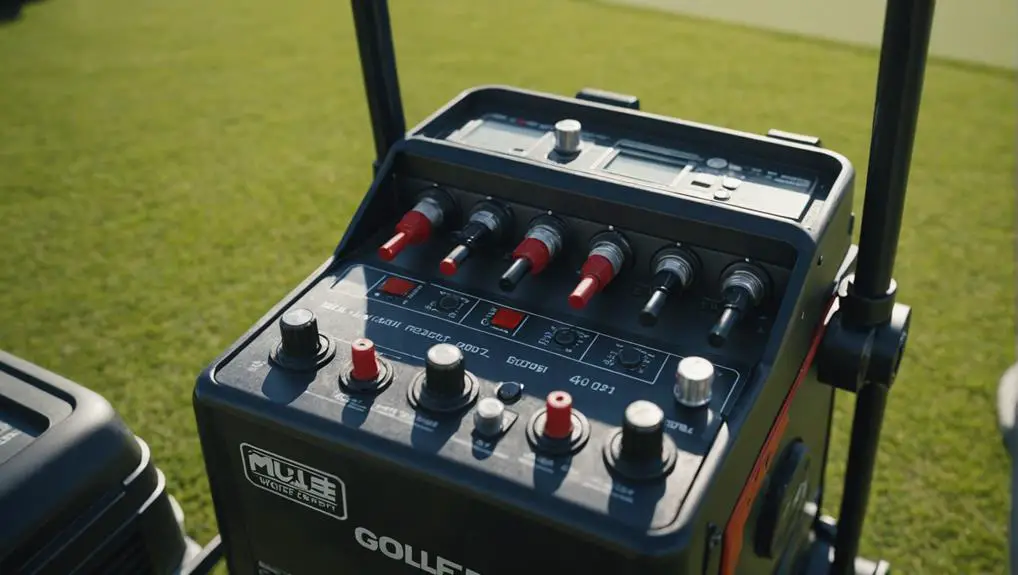
Inspect Charger Connections
Before you move on, make sure to check the power source again, ensuring it's functioning properly.
Next, examine the condition of the cables connected to the charger; look for any signs of wear, fraying, or corrosion that could hinder performance.
Addressing these issues is essential for the charger to operate effectively.
Check Power Source
To guarantee your golf cart charger operates effectively, it's vital to inspect the charger connections thoroughly. Start by confirming that the charger is plugged into a working outlet. Check for any tripped circuit breakers or blown fuses that could prevent power from reaching the charger.
Once you've verified the outlet is functional, examine the charger's power cord for any visible damage or fraying. A compromised cord can disrupt the electrical flow.
Next, inspect the connection between the charger and the golf cart. Make sure the plug fits snugly into the cart's receptacle without any signs of corrosion or dirt. If you notice any debris, clean the connection points gently with a cloth or a soft brush to enhance conductivity.
Additionally, verify that the charger's indicator lights are functioning; this can provide immediate feedback on whether the charger is receiving power.
Lastly, if your charger has an internal fuse, check that as well. Replacing it might restore functionality if it's blown.
Examine Cable Condition
After verifying that the charger is receiving power, turn your attention to the cables connecting the charger to the golf cart.
Begin by visually inspecting the cables for any signs of wear or damage, such as fraying, cracks, or exposed wires. If you notice any issues, it's essential to replace the damaged cables to guarantee safety and proper functionality.
Next, check the connections at both ends of the cables. Make sure they're securely attached to both the charger and the golf cart.
Loose connections can lead to poor conductivity, causing the charger to malfunction. If the connections appear corroded, clean them with a wire brush or contact cleaner to remove any buildup that might hinder electrical flow.
Examine Battery Health
Checking the battery health of your golf cart is vital for ensuring it operates efficiently and reliably. A compromised battery can hinder the charging process and affect your cart's performance. To examine the battery health effectively, follow these steps:
- Visual Inspection: Look for any signs of corrosion, cracks, or leaks on the battery terminals and casing. Corrosion can impede electrical connections.
- Check Voltage: Use a multimeter to measure the voltage of each battery cell. A healthy 6-volt battery should read around 6.3 volts; anything considerably lower may indicate issues.
- Test Specific Gravity: If your batteries are lead-acid, use a hydrometer to check the specific gravity of the electrolyte. A reading below 1.225 suggests the battery may be underperforming.
- Look for Swelling: Inspect the battery casing for any bulging or swelling. This can be a sign of internal damage or overcharging, and it's vital to replace affected batteries immediately.
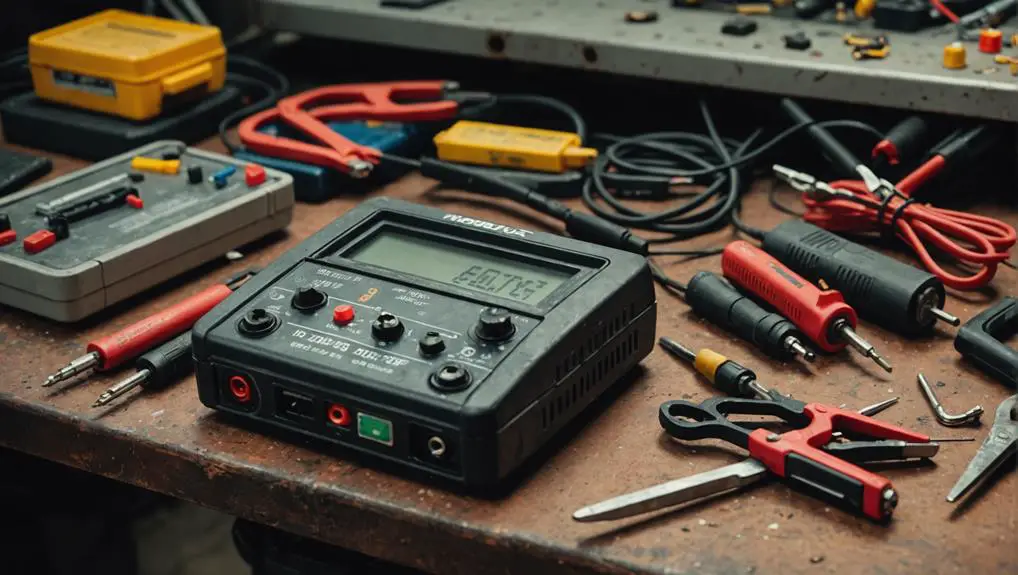
Test Charger With Multimeter
To test your golf cart charger with a multimeter, start by checking the voltage output at the charger's terminals; you should see a reading that matches the specifications for your battery type.
Next, inspect the power connections for any signs of corrosion or looseness, as these can impede performance.
Ensuring both the voltage and connections are in good condition is essential for effective charging.
Check Voltage Output
When troubleshooting a golf cart charger, one of the first steps is to check the voltage output using a multimeter. This process helps you identify whether the charger is functioning correctly.
Follow these steps to get accurate readings:
- Set the Multimeter: Turn the multimeter dial to the appropriate voltage setting, typically DC voltage for chargers.
- Connect Probes: Insert the black probe into the COM port and the red probe into the VΩmA port.
- Measure Voltage: Touch the black probe to the negative terminal and the red probe to the positive terminal of the charger.
- Read the Display: Observe the multimeter display. A reading close to the charger's rated voltage (often 36V or 48V) indicates it's working properly.
If the voltage reading is markedly lower than expected, the charger may be faulty.
Make sure you perform these checks while the charger is plugged in and turned on. This method will help you determine if the charger needs repair or replacement before moving on to inspect the power connections.
Inspect Power Connections
After confirming the charger's voltage output, it's important to inspect the power connections to guarantee everything is secure and functioning properly.
Start by unplugging the charger from the power source and the golf cart. Check the connection points for any visible damage, corrosion, or loose wires. Use a multimeter to test the continuity of the cables. Set your multimeter to the continuity setting, then touch one probe to the charger's positive terminal and the other to the battery's positive terminal. A beep indicates a good connection; if not, you may need to replace the cable.
Next, examine the connectors themselves. Make sure they're clean and free from debris. If you see corrosion, use a wire brush or an appropriate cleaning solution to restore conductivity.
After cleaning, reconnect all terminals firmly, ensuring they're secured to prevent any movement during charging.
Look for Faulty Components
Identifying faulty components is essential for troubleshooting a malfunctioning golf cart charger. Start by examining each part of the charger to pinpoint any issues that might prevent it from operating effectively.
Focus on these significant components:
- Fuse: Check the fuse for continuity. A blown fuse can interrupt the charging process.
- Diodes: Inspect the diodes for signs of damage or burn marks. These components are critical for directing current flow.
- Transformers: Look for any physical damage or burnt wiring in the transformer. If it's not functioning, the charger won't convert voltage properly.
- Cables: Examine all wiring and connectors for fraying or corrosion. Damaged cables can lead to poor connections, resulting in charging failures.
Once you've reviewed these components, replace any defective parts you find.
It's essential to guarantee that all connections are secure and that there are no obstructions in the flow of electricity.
This thorough inspection won't only enhance the performance of your charger but also prolong its lifespan.
Seek Professional Repair
If you've thoroughly checked the charger's components and still can't resolve the issue, it's time to contemplate seeking professional repair. Ignoring persistent problems can lead to further damage, increasing repair costs or risking safety hazards.
Start by identifying a qualified technician or repair service that specializes in golf cart chargers.
When you contact a professional, provide detailed information about the symptoms you've observed. Mention any error codes, unusual sounds, or performance issues. This information will help them diagnose the problem more efficiently.
If possible, ask for an estimate and inquire about warranties on the repairs.
Before handing over your charger, verify the technician has the proper certifications and experience. Research online reviews and testimonials to gauge their reliability.
Once your charger is in their hands, they may conduct tests using specialized equipment to pinpoint the issue, such as checking for electrical shorts, damaged circuits, or faulty components.
After the repair, make certain to ask for maintenance tips. Understanding how to care for your charger can prolong its lifespan and prevent future breakdowns.
Trusting a professional can save you time and guarantee your charger operates safely and efficiently.
Frequently Asked Questions
How Can I Tell if My Charger Is Compatible With My Golf Cart?
To determine if your charger's compatible with your golf cart, check the voltage rating. Most golf carts require 36V or 48V chargers, matching your cart's specifications.
Next, look at the connector type; it should fit securely without modifications. Additionally, consult your golf cart's manual for recommended charger models.
What Should I Do if My Charger Makes Unusual Noises?
If your charger makes unusual noises, it's crucial to act quickly.
First, unplug it immediately to prevent further damage.
Check for any visible signs of wear or damage, such as frayed wires or burnt components.
Inspect the connections to verify they're secure and free from corrosion.
If the issue persists, consult your user manual or contact a professional technician for further diagnosis and repair.
Don't ignore these sounds; they could indicate a serious problem.
Can Weather Conditions Affect My Golf Cart Charger's Performance?
Yes, weather conditions can considerably affect your golf cart charger's performance.
Extreme temperatures, both hot and cold, can impact the charger's efficiency and battery chemistry. If it's too cold, charging might slow down or stop altogether.
In hot weather, overheating can lead to damage. To guarantee peak performance, try to charge your cart in a climate-controlled environment and avoid exposure to direct sunlight or freezing temperatures during the charging process.
Is It Safe to Use a Universal Charger for My Golf Cart?
Using a universal charger for your golf cart can feel like tossing a square peg into a round hole.
While it might seem convenient, it's crucial to check compatibility first. If the voltage and amp ratings match, you might be okay, but many universal chargers lack the specific features tailored for golf carts.
This could lead to overcharging or damaging your battery. Always consult your cart's manual to verify safety and peak performance.
How Often Should I Maintain My Golf Cart Charger?
You should maintain your golf cart charger regularly to guarantee peak performance.
Inspect it every month for signs of wear, such as frayed cables or loose connections. Clean the terminals to prevent corrosion, and check for any unusual noises during operation.
It's also wise to test the voltage output periodically. If you notice any issues, address them immediately to prolong your charger's lifespan and keep your golf cart running smoothly.
Conclusion
In summary, fixing your golf cart charger doesn't have to feel like rocket science! By methodically checking the power source, inspecting connections, and testing components, you can tackle the issue like a pro. Don't let a faulty charger ruin your day on the green; with just a little effort, you can have it humming along in no time. If all else fails, don't hesitate to call in the experts—your golf game deserves nothing less than exceptional performance!