When your 48V Club Car solenoid decides to take a quiet moment, it can be more than just an inconvenience. You might be wondering where to start and what could be causing this issue. First, you'll want to check the basics, like ensuring the ignition is on and the brake is engaged. But what if those steps don't resolve the problem? Understanding the intricate dance of electrical components might just hold the key to getting your solenoid back in action. Let's explore the essential troubleshooting steps together.
Key Takeaways
- Verify the ignition switch is on and the brake pedal is fully engaged to activate the solenoid.
- Inspect battery connections for corrosion and ensure they are tight to maintain electrical flow.
- Measure battery voltage; a healthy 48V system should read around 48 volts total, with individual batteries at 6.2 to 6.5 volts.
- Check wiring to and from the solenoid for wear or damage, and tighten any loose connections.
- Test the solenoid for continuity and voltage; consider replacement if it fails to activate despite proper tests.
Understanding the Solenoid Function
The solenoid acts as an important component in your Club Car's electrical system, serving as the bridge between the battery and the motor. When you press the accelerator, the solenoid engages, allowing electrical current to flow from the battery to the motor, which powers your vehicle. This device operates as a relay, utilizing an electromagnetic coil to create a magnetic field that pulls a metal plunger. This action closes the circuit, enabling the energy transfer necessary for movement.
Your solenoid is typically mounted on the frame and connected to the battery's positive terminal. It has multiple terminals for connections to both the motor and the controller. Understanding its function is vital because any malfunction can disrupt the entire electrical flow, preventing the motor from receiving power.
It's important to note that solenoids can wear out over time or become damaged due to corrosion, overheating, or electrical issues. By recognizing how the solenoid operates within your Club Car, you can more effectively diagnose and address any problems that might arise, ensuring your vehicle runs smoothly and efficiently.
Proper maintenance and timely repairs will keep your solenoid functioning effectively for years to come.
Initial Troubleshooting Steps
When you're facing issues with your Club Car, starting with some initial troubleshooting steps can save time and effort.
First, verify that your ignition switch is turned on. A faulty switch or a poor connection can prevent the solenoid from receiving power.
Next, inspect the wiring connecting the solenoid to the battery and motor. Look for frayed wires, corrosion, or loose connections, as these can interfere with the electrical flow.
After that, check the solenoid itself. Listen for a clicking sound when you press the accelerator. If you don't hear anything, it may indicate a malfunction. You can also manually test the solenoid by bypassing it with a jumper wire to see if it engages.
Additionally, verify that the key is in the "on" position and that the brake pedal is fully engaged, as some models require this for the solenoid to activate.
If you've gone through these steps and still have issues, it may be time to investigate deeper into battery voltage or consider replacing the solenoid.
Taking these initial steps can help you narrow down the problem effectively.
Checking Battery Voltage
To guarantee your Club Car solenoid operates correctly, start by measuring the battery voltage.
Make sure the battery connections are clean and secure, as poor connections can lead to power issues.
Measure Battery Voltage
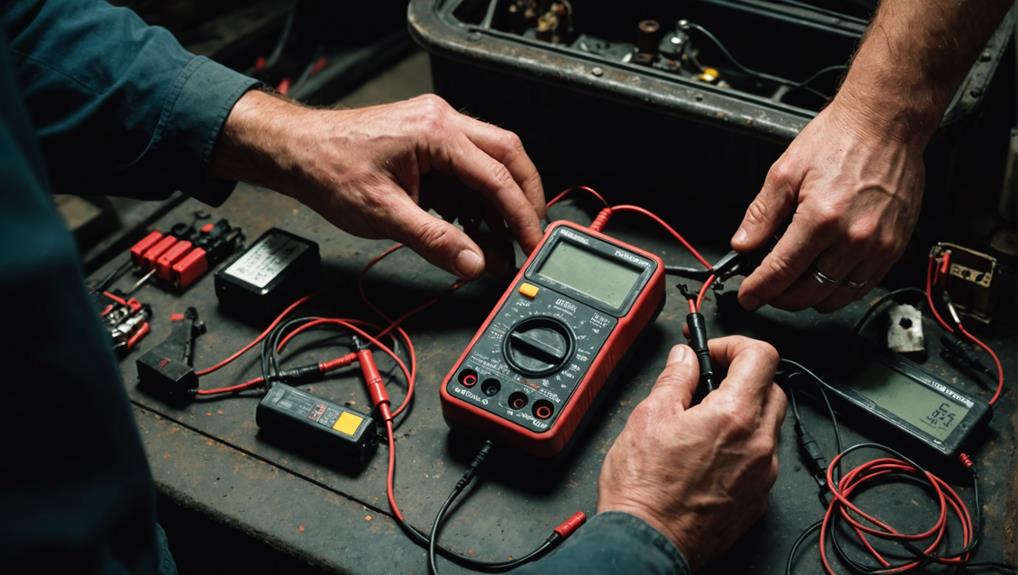
Checking battery voltage is a crucial step in diagnosing solenoid issues in your Club Car. Start by gathering your multimeter, making sure it's set to the correct DC voltage range.
Next, locate the battery pack; you'll want to measure the voltage across the terminals of each individual battery as well as the total voltage of the pack.
Place the positive (red) probe on the positive terminal and the negative (black) probe on the negative terminal of the first battery. Record the reading. Repeat this process for each battery in the series. A healthy 48V system should read around 48 volts total, with each individual battery ideally showing between 6.2 and 6.5 volts when fully charged.
After measuring, if you find any battery with a notably lower voltage, it might indicate a problem with that battery. Keep in mind that if the total voltage is low, it could suggest multiple batteries are underperforming.
Always make sure your batteries are charged and maintained properly to avoid solenoid malfunctions. This measurement provides essential insight into whether the battery pack is capable of supplying the necessary voltage to activate the solenoid.
Inspect Battery Connections
Although measuring battery voltage provides essential information, inspecting battery connections is equally important for guaranteeing proper solenoid function. Loose or corroded connections can prevent the necessary current from reaching the solenoid, causing it not to click.
Start by visually examining all battery terminals and cables. Look for signs of corrosion, such as a white, powdery substance on the terminals. If you find any, clean the connections using a mixture of baking soda and water. Use a wire brush or cloth to scrub away the corrosion, making sure you wear gloves and safety glasses during this process.
Next, check that all connections are tight. Use a wrench to secure any loose bolts or nuts. A secure connection is critical, as even slight looseness can lead to voltage drops, affecting performance.
Don't forget to inspect the cables for any fraying or damage. If you find any issues, replace the cables to guarantee a clean electrical path.
Once you've completed these inspections and repairs, you can proceed to test the solenoid for functionality. This step will help you rule out connection issues before moving on to more complex troubleshooting.
Test Voltage Drop
After verifying battery connections are secure and free from corrosion, the next step involves testing for voltage drop across the battery. This process helps you identify any issues that might prevent the solenoid from clicking.
To perform the test, follow these steps:
- Set Up Your Multimeter: Connect the multimeter leads to the battery terminals—red to positive and black to negative. Make sure the multimeter is set to measure DC voltage.
- Check Voltage at Rest: Record the voltage reading while the cart isn't under load. A healthy battery should read around 50-52 volts for a 48V system.
- Test Under Load: Have someone press the accelerator while you measure the voltage again. A notable drop (more than 2 volts) indicates a problem with the battery or connections.
If the voltage drops considerably under load, it usually points to weak batteries or bad connections. In this case, consider replacing the battery or further inspecting the connections to confirm stable performance.
This method will help you pinpoint the voltage issues affecting your Club Car solenoid.
Inspecting Wiring Connections
Before troubleshooting further, check the battery connections to verify they're secure and free from corrosion.
Next, inspect the wiring leading to and from the solenoid for any signs of wear, damage, or loose connections.
Proper wiring is essential for the solenoid to function effectively.
Check Battery Connections
Inspecting wiring connections is crucial when troubleshooting a Club Car solenoid. One of the first steps you should take is to check the battery connections. Loose or corroded connections can prevent sufficient power from reaching the solenoid, causing it to fail to click.
Here's a quick checklist to guide you through this process:
- Inspect Battery Terminals: Look for any visible corrosion or dirt on the battery terminals. Clean them with a wire brush, guaranteeing a good metal-to-metal connection.
- Tighten Connections: Confirm that the battery cables are securely fastened. If they're loose, use a wrench to tighten the nuts on the terminals. A snug connection is crucial for peak performance.
- Check for Frayed Wires: Examine the battery cables for any signs of wear or fraying. Damaged wires can lead to poor electrical contact, so replace any that are compromised.
Inspect Solenoid Wiring
To guarantee your Club Car solenoid operates correctly, you need to carefully inspect the wiring connections leading to and from the solenoid. Start by checking the connections for any signs of corrosion, damage, or loose wires. Corroded terminals can hinder electrical flow, so clean them with a wire brush if necessary. Ascertain that all connections are tight and secure; a loose connection could prevent the solenoid from engaging.
Next, examine the wiring insulation for any frays or breaks. Damaged insulation can lead to short circuits, compromising the solenoid's function. If you find any issues, consider replacing the affected wires. You should also trace the wires back to the battery and controller, ascertaining there are no interruptions in the circuit.
After inspecting the wiring, it's a good idea to test the voltage at the solenoid terminals. Use a multimeter to verify that the appropriate voltage is present when the pedal is pressed. If the voltage is absent or inconsistent, it could indicate a problem upstream in the wiring or components.
Testing the Solenoid
When testing the solenoid on your Club Car, you'll need a multimeter to check for continuity and voltage. Start by ensuring your multimeter is set to the correct settings for the tests you'll perform.
Follow these steps to effectively test the solenoid:
- Check for Continuity: Disconnect the solenoid from the power source. Set your multimeter to the continuity setting, then connect the probes to the solenoid terminals. If the multimeter beeps or shows a low resistance reading, the solenoid has continuity and is likely functional.
- Measure Voltage: Reconnect the solenoid to the battery and set your multimeter to measure DC voltage. Connect the probes to the input and output terminals of the solenoid. You should see a voltage reading close to 48V when the pedal is pressed. If there's no voltage, the issue may lie elsewhere in the circuit.
- Inspect Activation: When you press the accelerator, listen for a clicking sound from the solenoid. If it doesn't click but passes continuity and voltage tests, it may be time to contemplate further diagnosis or replacement.
With these tests, you can determine the solenoid's functionality effectively.
Replacing the Solenoid
Replacing the solenoid on your Club Car can be a straightforward process if you follow the right steps. First, verify the power is off by disconnecting the battery cables. It's essential to prevent any accidental shorts or shocks.
Locate the solenoid, typically mounted near the battery pack, and identify the wiring connections.
Next, take a photo of the current wiring setup for reference. Carefully disconnect the wires from the solenoid. Use a wrench to remove the mounting bolts, allowing you to lift the old solenoid out.
Before installing the new solenoid, check the mounting surface for corrosion or debris and clean it if necessary.
Install the new solenoid by securing it with the mounting bolts, making sure it's tight and stable.
Reconnect the wires according to the photo you took earlier, making sure each connection is secure. Double-check all connections for proper placement and verify there are no loose ends.
Examining the Controller
Examining the controller is crucial for diagnosing electrical issues in your Club Car. If your solenoid isn't clicking, the controller could be the culprit. Start by checking the connections and verifying they're secure. Loose or corroded connections can disrupt the electrical flow.
Next, follow these steps to evaluate the controller:
- Inspect for Damage: Look for any visible signs of wear, cracks, or burnt components. Physical damage can affect the controller's performance.
- Test Voltage Output: Using a multimeter, check the voltage output at the controller terminals. You should see readings consistent with your system's specifications. If the output is considerably lower, the controller may need replacement.
- Check for Error Codes: Some controllers have diagnostic capabilities that can reveal error codes. Refer to your Club Car manual to interpret these codes, which can guide you in troubleshooting.
If these checks don't reveal any issues, consider that the controller might've internal faults requiring professional evaluation.
Addressing controller problems promptly guarantees your Club Car operates efficiently and safely.
Reviewing Safety Precautions
Safety precautions are essential to guarantee a smooth and hazard-free solenoid repair on your Club Car. Before starting any work, disconnect the battery to prevent accidental shocks or shorts.
Always wear protective gloves and goggles to safeguard against electrical hazards and potential debris.
Ascertain your workspace is clean and organized. Remove any unnecessary tools or materials that could create distractions or hazards. If you're working outdoors, avoid wet conditions, as moisture can lead to electrical issues.
When handling the solenoid, check for any signs of corrosion or damage. If you notice any, take care to address these issues before proceeding.
Use insulated tools to minimize the risk of shorts and ascertain that your tools are in good condition.
Preventative Maintenance Tips
Taking the time to perform regular preventative maintenance can greatly extend the life of your Club Car's solenoid and improve overall performance. By following a few key practices, you can guarantee your solenoid functions efficiently and reliably.
- Inspect Connections: Regularly check the wiring and connections to the solenoid. Look for signs of corrosion, fraying, or loose connections. Tightening and cleaning terminals can prevent electrical issues.
- Clean the Solenoid: Dust and debris can accumulate around the solenoid, potentially affecting its operation. Use a soft brush or cloth to keep the area clean, making sure that nothing obstructs the solenoid's functionality.
- Test Battery Voltage: Verify your batteries are fully charged and functioning properly. Use a multimeter to check individual battery voltages. If any battery shows a notably lower voltage, consider replacing it, as weak batteries can lead to solenoid failure.
Frequently Asked Questions
Can a Faulty Solenoid Cause Battery Drainage Issues?
Yes, a faulty solenoid can cause battery drainage issues.
If the solenoid fails to disengage properly, it might create a continuous circuit, leading to excessive current draw from the batteries. This not only drains the batteries but can also cause overheating and damage to other components in your electrical system.
Regularly checking the solenoid's condition can help prevent these problems and guarantee your system functions efficiently.
How Long Should a Solenoid Typically Last?
A solenoid typically lasts anywhere from 5 to 10 years, depending on usage and environmental conditions.
If you're using it frequently in harsh weather or high-demand situations, it may wear out faster.
Regular maintenance can extend its lifespan. You should keep an eye on its performance.
If you notice any irregularities, it's wise to test or replace it before it completely fails to avoid further issues with your electrical system.
What Tools Are Needed for Solenoid Testing?
You might think testing a solenoid requires complicated tools, but it's simpler than you expect.
To effectively test a solenoid, you'll need a multimeter to measure voltage and continuity, a socket or wrench for physical adjustments, and jumper cables for direct power application.
If you're dealing with a faulty solenoid, these tools will help you diagnose the issue quickly and efficiently, ensuring you can get your system back up and running.
Is It Safe to Work on a Live Circuit?
It's generally not safe to work on a live circuit. You risk electric shock or damage to equipment.
Before starting any maintenance, always disconnect power to guarantee your safety. If you must troubleshoot while powered, use insulated tools and wear appropriate personal protective equipment.
Keep a safe distance from exposed wires and components. Remember, prioritizing safety prevents accidents and guarantees you can complete your task without injury or equipment failure.
Can I Use a Different Voltage Solenoid in My Club Car?
You shouldn't use a different voltage solenoid in your Club Car.
Each solenoid is designed for a specific voltage, and using one with a different rating can lead to poor performance, overheating, or even damage to your vehicle's electrical system.
It's best to stick with a 48V solenoid to guarantee compatibility and reliability.
Always consult your vehicle's specifications and manufacturer guidelines when replacing components for peak operation.
Conclusion
By following these steps, you can restore your 48V Club Car solenoid to its ideal state in no time, almost like magic! Always start with the basics—check your battery voltage and wiring connections before diving deeper. If you find the solenoid faulty, replacing it is straightforward. Regular maintenance can prevent future issues and keep your cart running like a dream. Stay proactive, and you'll avoid the headache of unexpected breakdowns.